
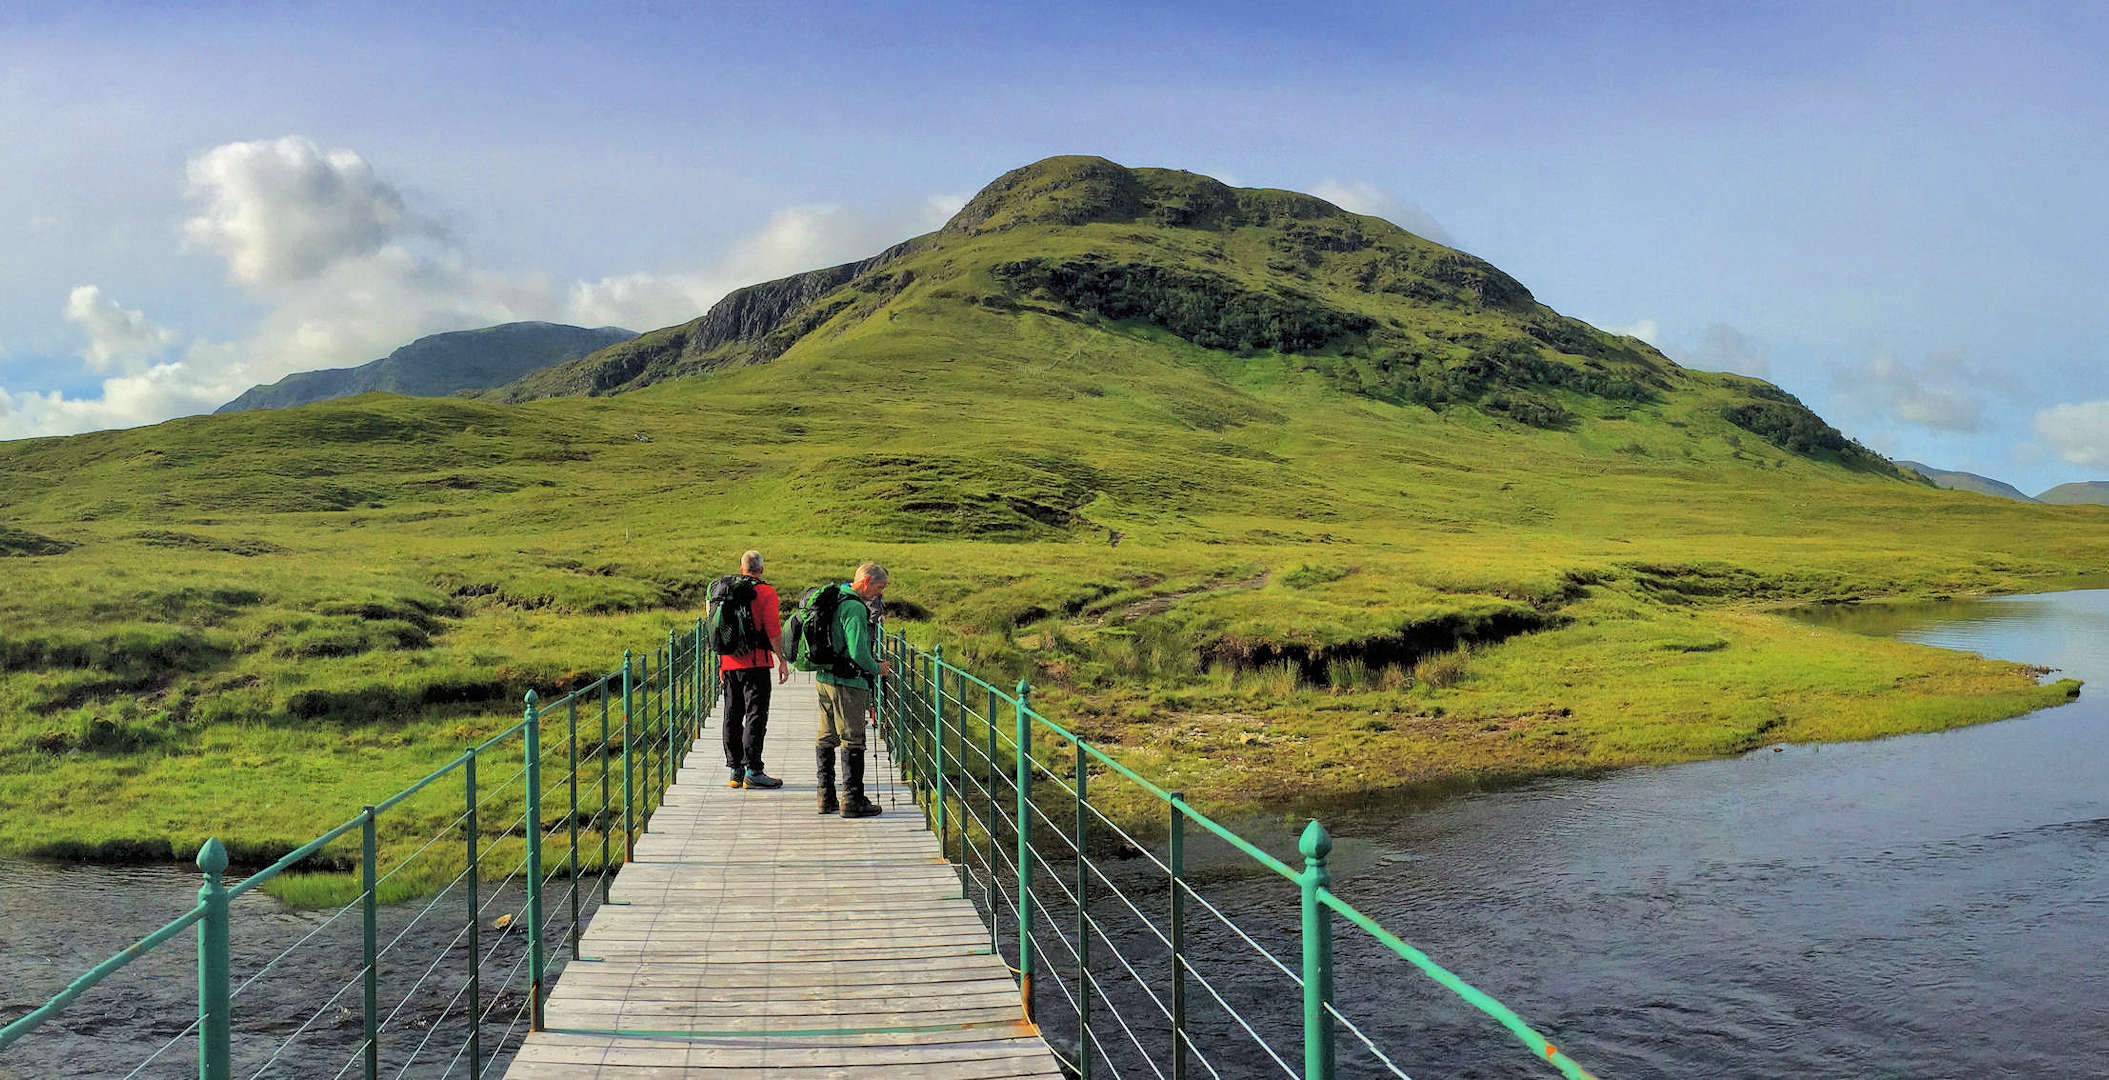
Western Fannichs
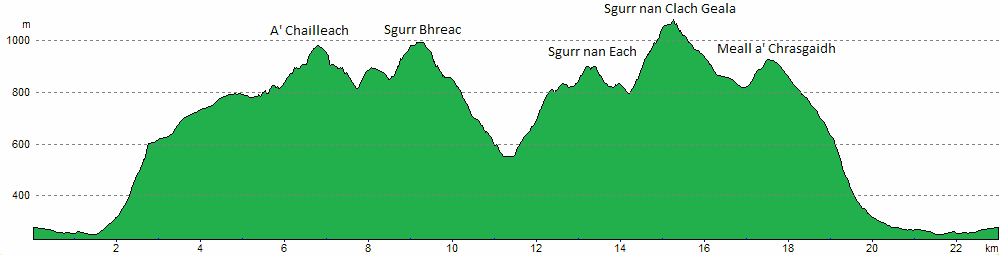
Hillwalking route on the western Fannichs, tracing ridges above corries to 5 Munros including Sgurr nan Clach Geala, the highest and most distinctive.
Route outline
| Munros | ||||
| Ascent | 1840m (6030ft) | |||
| Distance | 23km (14m) | |||
| Time | 8:50hr | |||
| Start/finish | A832 by Loch a' Bhraoin Grid Ref : NH163760 | |||
| Terrain |
| |||
| Nav |
| |||
| Effort |
| |||
| Scenery |
| |||


On a fine circular route, there are 5 Munros standing in the western half of the Fannichs mountain range. The easiest approach to these mountains begins from the roadside a few miles west of Corrieshalloch Gorge, where an estate track leads to the eastern end of Loch a' Bhraoin. Above this, a series of footpaths, some more distinct than others, follow mountain crests and ridges above some corries with impressive crags.
This group of Munros is split by a col at 550m, enabling the route to be easily divided into two shorter and less demanding hillwalks.
The route can also be combined with the Eastern Fannichs making for an epic day bagging all 9 Munros in the Fannichs, the 'Fannichs Big 9'. As this approaches from the north, the start and finish are from different locations some 15km apart, therefore organising transport or stashing a bike would be needed to avoid a very lengthy walk back along a road. Alternatively, bagging all the 9 Munros in the Fannichs from the south would avoid this hassle.
Show map

Route description
1. Getting to Loch a' Bhraoin

Start point heading to Loch a' Bhraoin
Around 12km south of Ullapool, the A832 branches off the main A835 at Braemore junction. This road climbs over moorland and drops to Dundonnell at the southern tip of Little Loch Broom and continues on toward Gairloch.
Around 6km west of Braemore Junction, the A832 sweeps past some forestry, turns north-west and climbs uphill. By the end of the last patch of forestry is the head of an estate track, just west of which is a parking area with room for around 10 vehicles. There is more parking further up the road.
2. A' Chailleach

Bridge over Abhainn Cuileig
From the parking area, head to the top of the estate track, which is gated and beside which is a right-of-way sign pointing to Loch a' Bhraoin.
With forestry on your left (east), follow this track until it comes to a turning circle with a gate  . There are two narrower tracks heading off in opposite directions, take the one on the left and head into woodland. The track crosses a hydro road, comes out of the woodland and arrives at the head of Loch a' Bhraoin by a bridge
  over the Abhainn Cuileig.
Cross the bridge and hike southwards on a soggy and rough path.
The path swings left  , at which point leave it and aim directly uphill on wet soggy ground, tracing the signs of a faint trod.
Ground begins to rise more steeply with the path beginning to twist and turn as it avoids crags while climbing up the nose of Leitir Fhearna. There is a little easy scrambling higher up with some vantage points for photo opportunities.
Reaching the top of Leitir Fhearna, a small cairn is met  from where the path, now very faint, heads south-west over a grass-covered broad crest for around 1km. The path becomes more obvious as it turns southwards, climbing gently aiming while aiming for boulderfield ahead.
As the path nears the boulderfield  , instead of keeping to the crest, it surprisingly begins to contour on the west side of Druim Rèidh above Toll an Lochan. Keep on this path, which travels to Bealach Toll an Lochain
  between A'Chailleach and Toman Coinich, hitting a rough and bouldery section as it nears the col.
From the bealach, a path follows a line of fence-posts as it continues up the crest of A' Chailleach's eastern shoulder. Just to the south of the crest, an easier line on softer ground keeps out of any prevailing westerly winds.

Heading up Leitir Fhearna, Meall an t-Sithe behind
 is just a couple of minutes away.
Heading up Leitir Fhearna, Meall an t-Sithe behind
3. Sgùrr Breac

Toman Coinnich and Sgùrr Breac from A' Chailleach
Retrace your steps back down to Bealach Toll an Lochain , from where you'll see a path heading directly up the minor summit of Toman Coinnich  ahead. You can opt to head up and over this to reach the next bealach, Bealach a' Choire Bhric
  , though it's actually more direct to contour around Toman Coinnich on its southern face. In mist, compass work might be needed as there are no paths to follow on the contour route !

Sgùrr Bhreac from Toman Choinnich
, follow a rough path zig-zagging a route up the western shoulder of Sgùrr Breac. A cairn comes into view and the ground levels out - this is not Sgùrr Breac's summit ! Hike a little further and the cairn marking the highest point  comes into view, a couple of hundred metres further on.
Sgùrr Bhreac from Toman Choinnich
4. Sgùrr nan Each

Sgùrr nan Each from the wall on Sgùrr Bhreac
If wanting just to bag A' Chailleach and Sgùrr Breac, you could about-turn, re-trace your steps to Bealach a' Choire Bhric , head up Toman Coinnich , then follow the crest of Druim Rèidh to return via the route taken up.
To continue onward to Sgùrr nan Each, follow the path eastwards on Sgùrr Breac's summit plateau. Beware, particularly in mist, the path turns north-east, to lead to the top of steep ground, then follows the top of this south-east before turning eastwards. A more direct route may be advisable, taking a bearing eastwards from Sgùrr Breac's summit cairn to begin to lose height on grassy slopes.
Both these routes merge and now on Sgùrr Breac's eastern shoulder, follow the obvious path to cross the faint remains of a wall. The path sticks to the crest of the Sgùrr Breac's eastern shoulder as it swings south-east, then turns eastwards for a final bit of descent to reach a bealach  at 548m.
Another path crosses the bealach north-to-south - should you wish to call it a day at this point, a direct return to the head of Loch a' Bhraoin can be made from here.
To continue towards Sgùrr nan Each, from the bealach head eastwards and begin climbing up grassy slopes - there are some burns in which to refresh water-bottles on route. Above and ahead there is a line of faint crags - head to near the right end of this, its straightforward and fairly easy to negotiate.
Higher up Cadha na Guite  - the bealach between Sgùrr nan Clach Geala and Sgùrr nan Each - is reached on which a path follows the crest line southwards. Follow this path as it sticks close to the edge of Coire Mòr with crags falling eastwards.
On the final approach to the summit, a direct line slightly to the west of the path takes a route over softer ground, therefore avoiding rocky loose terrain.

Sgùrr nan Each's summit, looking south
 is reached with fine views over Loch Fannich and to the remaining Fannich peaks.
Sgùrr nan Each's summit, looking south
5. Sgùrr nan Clach Geala

On Sgùrr nan Each's summit, Sgùrr nan Clach Geala ahead
Re-trace your steps back to Cada na Guite , from where the the ascent ahead up Sgùrr nan Clach Geala's southern shoulder appears quite immense. The climb up this is much easier and less daunting than expected !
From the bealach, simply follow the well-worn and obvious path uphill. The climb is continuous and just shy of 300m and levels out by some rocks on a flat shoulder, south-east of Sgùrr nan Clach Geala's summit.

Approaching Sgùrr nan Clach Geala's summit from the south-east
 with the shattered remains of a trig-point a few footsteps to the north.
Approaching Sgùrr nan Clach Geala's summit from the south-east
6. Meall a' Chrasgaidh

On way to Meall a' Chrasgaidh
If windy or wet, the descent down Sgùrr nan Clach Geala requires a bit of care !
From Sgùrr nan Clach Geala's summit, follow the path on the crest above Eagan Tuill Bhig as it turns north-eastwards. There are a couple of slabby bits that may be slippy if wet and it may be advisable to keep a distance from the coire's edge if windy.
After losing height of around 100m, leave the edge and aim due north encountering a few patches of boulderfield. A faint path can be traced passing the western side of a lochan  before meeting a large erratic boulder (a fine spot for a lunch stop). The route then crosses a damp bealach
  , where stepping stones can be found to hop over the wettest sections.
Beyond the bealach the path becomes more obvious as it climbs up the southern slopes of Meall a' Chrasgaidh, though it does seem to try to hug the top of the coire above Loch a' Mhadaidh and I found it easier to aim more direct for the hill's summit.

Looking back to Sgùrr nan Clach Geala from Meall a' Chrasgaidh's summit
 just above a stone shelter circle with enough room for 2 or 3 people to hide out of easterly winds.
Looking back to Sgùrr nan Clach Geala from Meall a' Chrasgaidh's summit
7. Return

Looking to An Teallach from Meall a' Chrasgaidh's summit
Leaving Meall a' Chrasgaidh's cairn behind, aim north-west over the stony ground and boulderfield on its crest. A line of grassy ground is crossed, after which more stony terrain is descended on, though much easier than that on the crest.
Gradually turning westwards, some steeper ground is dropped on and the hillside becomes grass covered for the remainder of descent.
The path heading down from the bealach between Sgùrr Breac and Sgùrr nan Each is met  and followed down to a ford
  on the Allt Breabag. In most conditions this should be easily crossed. However, if it is in spate, instead keep to the eastern bank of the river and follow a faint path through heather to a rickety old bridge
  further downstream.
Once the Allt Breabag has been crossed, the bridge over the Abhainn Cuileig is met for a return back to the roadside.
8. Fannichs Big 9 Munros route

Heading to Sgùrr Mòr from Meall a' Chrasgaidh
This route can be extended towards Sgùrr Mòr and onwards to bag all the 9 Munros in the Fannichs, giving a total ascent of 2900m (9,500ft) over a distance of 35km (22m), with an estimated tìme of 13:30hr.
From Meall a' Chrasgaidh's cairn about-turn and return towards the bealach , then make a fairly direct route towards Càrn na Criche  , picking up a faint path on the way.
Beyond Càrn na Criche's summit, the path drops slightly, meandering a route between rocks to arrive at the foot of Sgùrr Mòr - the climb ahead tooks substantial !
The path begins up Sgùrr Mòr's north-western shoulder obvious enough, then occasionally disappears and re-appears as it encounters rocks and boulders. Higher up, after encountering a few false summits, the large cairn on Sgùrr Mòr's true summit  appears abruptly and thereafter reached quickly.
The remainder of this extended route, the 'Fannichs Big 9', is described in reverse on the Eastern Fannichs page. A link to download the GPX of the 'Fannichs Big 9' is below on this page.
Route profile »
Maps and GPX downloads »

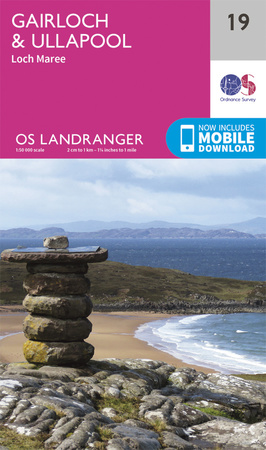


The map images above link to items on Amazon. A small commission is earned on any map purchased which helps fund the operating costs of this website.
Weather forecasts »
| Regional | MWIS - Northwest Highlands |
| Peak specific | Mountain Forecast.com Met Office YR.no |
| Seasonal | SAIS - Torridon Midge forecast |
Alternative and nearby routes »
Fannichs Big 9 | |

|
An epic day beginning with a cycle to Loch Fannich, continues with a route taking in all 9 Munros in the Fannichs mountain range. Peaks : 9 Munros
Ascent : 3050m (10010ft) Distance : 61km (38m) Time : 15:30hr |
Eastern Fannichs Munros | |

|
A circular hillwalking on the eastern Fannichs Munros from An Coileachan to Beinn Liath Mhor Fannaich and including Sgùrr Mor, the highest peak in the range. Peaks : 4 Munros, option of 1 Corbett
Ascent : 1150m (3770ft) Distance : 17km (11m) Time : 6hr |
Groban and Beinn Bheag | |

|
Hillwalking and biking route along Loch a' Bhraoin and up the Fiona peaks of Groban and Beinn Bheag in the land between Fisherfield and the Fannichs. Peaks : 2 Fionas/Grahams
Ascent : 845m (2770ft) Distance : 22km (14m) Time : 4:10hr |
Creag Rainich from Loch a' Bhraoin | |

|
Hillwalking route from Loch a’ Bhraoin up Creag Rainich. A straightforward climb on grass-covered slopes to the Corbett summit above the loch. Peaks : 1 Corbett
Ascent : 840m (2760ft) Distance : 17km (11m) Time : 5:40hr |
Beinn Enaiglair from Braemore | |

|
Hillwalking route up Beinn Enaiglair from Braemore Junction. Estate tracks then a pathless circular route over heather slopes lead to fine viewpoints. Peaks : 1 Corbett
Ascent : 740m (2430ft) Distance : 12km (7m) Time : 4:15hr |


